A map and compass make up two of the 10 essentials recommended for safe backcountry travel, but they’ll do little good if you don’t know how to use them. Misuse could even turn a situation in which you’re simply confused into one in which you’re totally lost. The bottom line? Learn proper technique before your safety depends on it.
Compass Basics
A baseplate compass includes three important parts (see opposite page):
1. The baseplate, which features the direction-of-travel arrow, or DOT, and the index pointer;
2. The compass housing, which includes the orienteering arrow (a.k.a. the shed), the orienteering lines, and the dial with degrees;
3. The magnetic needle. A compass works by aligning itself with Earth’s magnetic field. The red, or magnetic, north end on a compass needle has been magnetized with a positive charge and is attracted by its opposite: Earth’s south magnetic pole, which is located near the geographic North Pole.
Yes, you read that right. The red end of the needle on your compass actually points to the south magnetic pole. But by convention, and to avoid confusion, we say that a compass needle always points north.
Getting Oriented
Orienting a map with a compass is perhaps the most important skill to master when navigating the backcountry. All you need to do is follow these steps, pictured above:
1. Holding your compass, rotate the dial until the “N” (for north) matches up with the index pointer.
2. Place your compass on any map near the declination diagram (see the next page for an explanation of declination), with the edge of the baseplate along the True North (TN) arrow on the diagram. Make sure the DOT on your compass points north, or toward the top of the map. (See fig. A, above.)
3. Turn the dial in the same direction as the Magnetic North (MN) arrow on the declination diagram. Make sure you move the dial the same number of degrees as is indicated on the declination diagram. For instance, if the diagram reads, “16 degrees,” and the MN arrow is left of the TN arrow, your dial should indicate 16 degrees. (See fig. B.)
4. Now that you have compensated for your local magnetic declination, place the compass along the edge of the map and rotate the map until the red part of the magnetic needle overlays the orienteering arrow. (“The red is in the shed.”) Your map is now accurately oriented with your surroundings. (See fig. C.)
The beauty of this method is that you don’t need to remember whether to add or subtract, turn right or left, or rotate clockwise or counterclockwise. All you need to do is match the direction of the MN arrow on your map. This is true whether you’re in California, Maine, or somewhere in between.
Finding your Bearings
Once you’ve mastered orienting a map to the field using a compass, you can now use that map to reach a destination that’s out of your sight. Just follow these steps.
1. Orient the map with the terrain, using the technique already described. Then identify your current location and the location you want to reach on the map.
2. Keeping your map as still as possible, place the right (or left) lower corner of the baseplate at your current location on the map. Then place the upper corner (DOT arrow end) of the baseplate on the location you want to reach. If the location you want to reach is farther than the length of the baseplate, extend the baseplate’s edge with something that creates a straight line.
3. Without moving the map or compass, turn the compass dial until the orienting arrow boxes the red part of the magnetic needle.
4. Pick up your compass and read the degree (i.e., the bearing) at the compass index pointer. You now have a field bearing that will allow you to hike in a straight line toward your destination.
Moving from A to B
Following a bearing is not as easy as it seems. Some think if they can keep the red in the shed, they’ll hike in a straight line. This can lead them to drift from the intended bearing to parallel bearings, slowly moving away from the desired path. To avoid this, learn and practice the tips below.
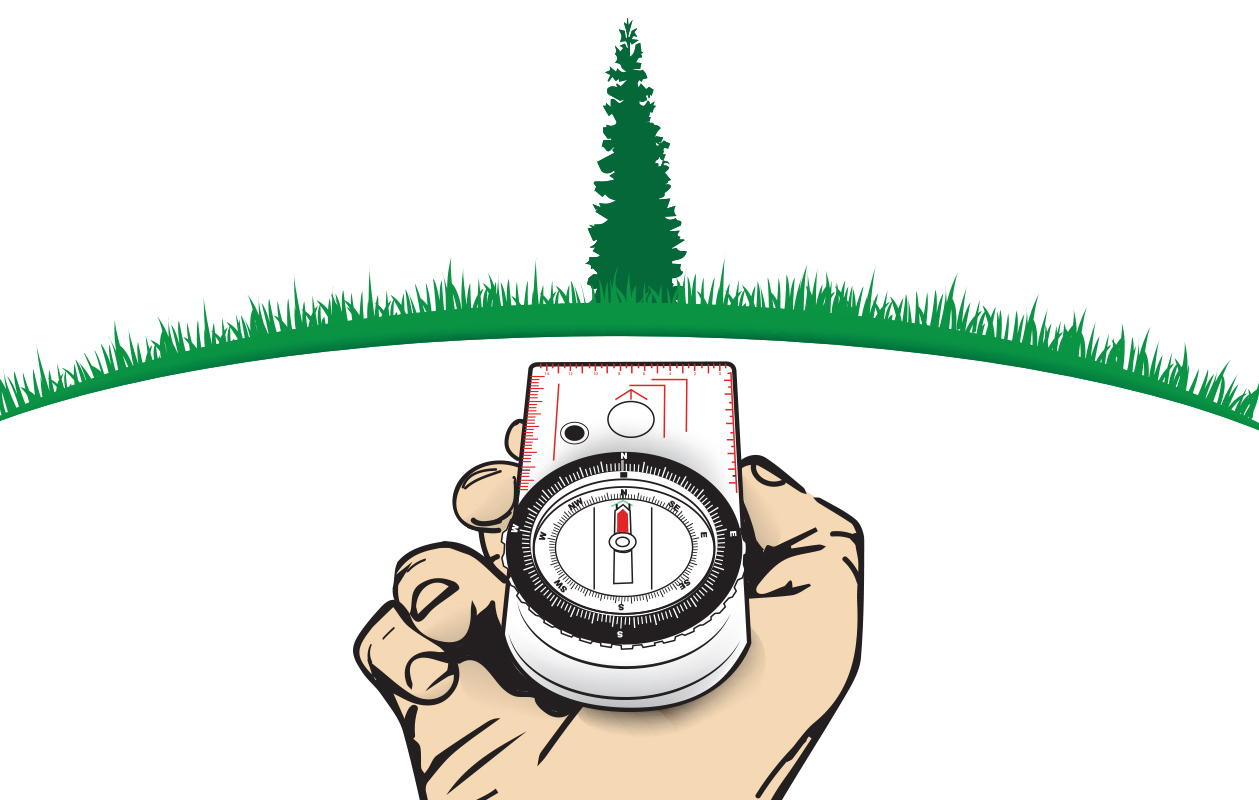
1. Once you have your field bearing, hold the compass perfectly flat (parallel to the ground), with the DOT perpendicular to the midline of your body.
2. While looking down at your compass, turn your body and the compass as one unit until the red is in the shed.
3. Now carefully look ahead of you, extending the DOT in a straight line, and select a faraway but distinctive landmark in your line of sight. This might be a tree, a boulder, or a fellow hiker you asked to walk ahead.
4. Drop your compass and find the easiest and safest way to reach the chosen landmark. Once there, repeat the process.
5. To return to your starting point, reverse the bearing by boxing the white part of the magnetic needle in the shed. Or just turn the compass around so the DOT arrow is pointing toward you and put the red in the shed.
This story was adapted from AMC’s Mountain Skills Manual. Learn more in the companion story “What is Declination?”